
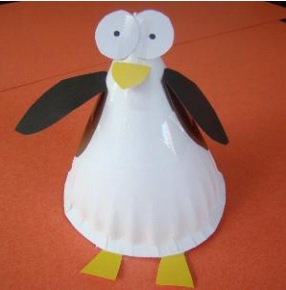
Paper Plate Penguin (by Lorie from Reading Confetti)
Paper plates have never looked so cute. With items in your home, make the adorable Paper Plate Penguin. Paper plate crafts for kids are wonderfully inexpensive ways to stay busy and happy. Display your animal crafts for kids in your room or use them as dolls to run a zoo. This is a great craft for children who are in preschool and kindergarten. It's easy enough that they won't get frustrated, but it still poses a challenge for their little minds and hands. You can wear these funny penguins as hats or let them stand tall on their own.
Materials:
Paper plate
Clear tape
Black, yellow, and white construction paper
Black marker
Paper plate
Clear tape
Black, yellow, and white construction paper
Black marker
Instructions:
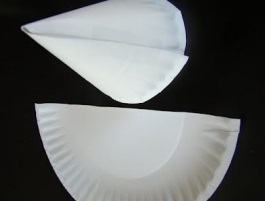
1.) Cut a paper plate in half and use tape to secure it into a cone shape.
1.) Cut a paper plate in half and use tape to secure it into a cone shape.
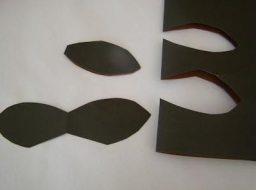
2.) Fold a piece of black paper in half and cut two wing shapes starting at the crease. (Leave the two pieces connected. This will make the wings stand out.)
3.) Tape the underside of the wings to the plate cone. Add a beak from yellow paper using the same method.
4.) Cut two circles from the white paper, draw little black dots on them, and tape them down at the top of the cone.
5.) Cut two feet out of yellow construction paper. Tape these onto the bottom of the cone. If you use the same method as the wings and beak, you can tape the flap of the feet to the inside of the cone.